-PhotoRoom_png-PhotoRoom.png)
Colour Sampling and Why It's Important
- Rubio Monocoat Malaysia
- Jul 6, 2023
- 3 min read
Colour sampling might seem like a waste a time to most people, but it actually is a very important step! Especially when you are working on a client's project, if the colour sample is not representative of the final colour, it can lead to frustration and ultimately unnecessary work because you'd have to redo it all.
When making colour samples, it doesn't matter if you are dealing with a wooden floor or a wooden table; the approach will be similar.
Selecting Wood For A Colour Sample
The wood selected for colour sampling needs to represent the wood that is going to be used in your project. The best way to do this is to use wood from the same batch(es) you will be using for the final project. But if you're unable to get it, use wood that closely matches your project! This is vital because the outcome of your final relies very heavily on the wood that was used.
Wood is a naturally grown material, and variations in colour within one species are typical and to be expected. Variation in wood colour will determine how the final colour will look like when you have applied Oil Plus 2C.
For example, if there is no or minimal sapwood present in a wood floor and the colour sample is performed on a primarily sapwood board, you will more than likely not get the project to match with the approved colour sample satisfactory.
Check out the image below where a light colour White Oak and a darker White Oak board are sampled using Oil Plus 2C colours Smoke 5% and Smoke.

Wood species used in a project may exhibit up to 3 colour variations within that species. Unless the project is completed with selected wood close in colour, try to have at least 2-3 colour variations in the wood chosen for the colour sample board.
Preparing The Sample Surface
Sanding
When preparing wood for colour samples, it is essential to mimic the sanding process that will be performed on the actual project, regardless if it is a wood floor or a wood table.
Sanding affects how open the grain of the wood is, and as a result, differences in sanding will allow for more or less product penetration. If using a pigmented colour, more product penetration results in more pigment, which in turn affects the final colour.
The recommended final sanding grit for Oil Plus 2C is 120.
Typically, sanding a wood floor is done with a big aggressive belt sander (using 2-3 different abrasive grits, starting coarse and using progressively finer grits) followed by a finish sanding procedure whereas a tabletop may get sanded with only random orbit sanders.
Again, when making colour samples, it is critical to mimic the exact sanding process that will be done when sanding the final surface.
Sample Preservation
Many hardwood flooring contractors sand the floor and do their colour samples directly on the floor. While this is a very good option, the approved colour will get sanded away. Now that proof is gone forever, it cannot be used as a reference against the final finish colour.
Applying The Sample Colour
When applying a Rubio Monocoat oil such as the Oil Plus 2C on a colour sample board, it is essential to mimic the actual oil application process. This is more important when dealing with wood flooring vs dealing with furniture.
Flooring
In the case of hardwood floors, it is typical to use equipment like a heavy electric floor buffer to work the oil into the wood surface and follow with that the same tool to towel-buff off the excess oil from the surface. This mechanical application process is not easily replicated by just applying the oil by hand wiping. So, mimic the actual floor application process with a simulated process when creating colour samples. The use of an electric sanding or small automotive buffer outfitted with red or white pads and rags may be more effective than just wiping the oil by hand when creating a colour sample panel.
Note:
Compared to finishing by hand, heavy electric floor buffers typically leave the oiled wood surface feeling slightly smoother and with a slightly lighter colour.
Furniture
With wood furniture, you often don't use such heavy and poweful floor finishing equipment. Instead, oiling and buffing is completed mostly by hand. In that situation, hand finishing is just fine for creating a colour sample.
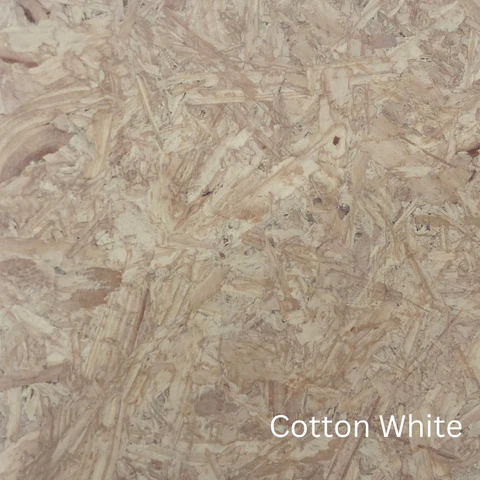
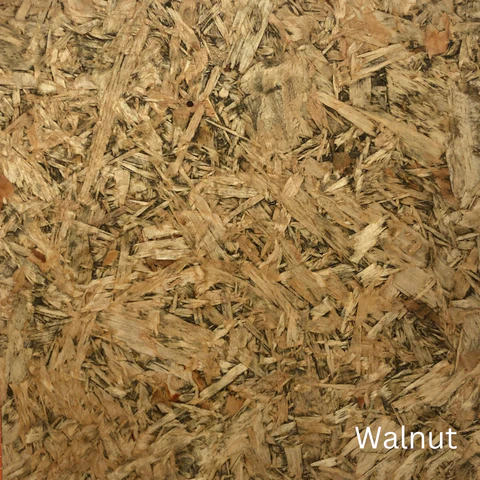
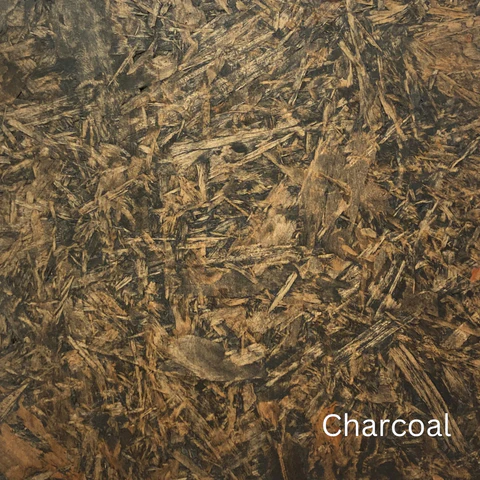
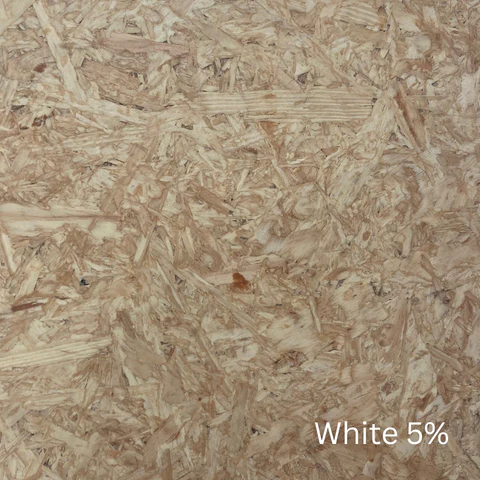
Colour Sampling on Laminex Strandboard
Credits to our friends at Rubio Monocoat USA for providing the contents for this post!
Comentarios